To create a project:
- Select File > New > Project… .
-
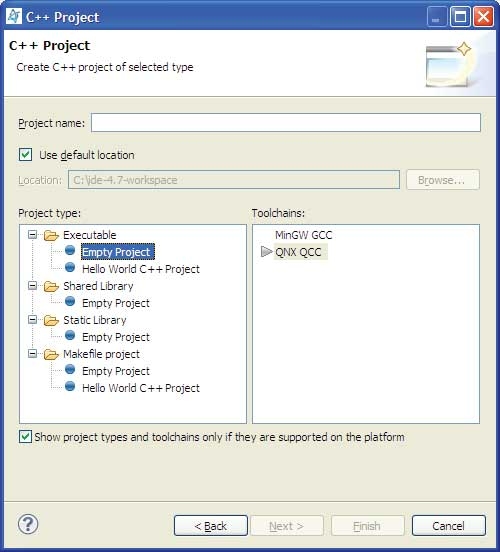
Select the type of project you want to create. For example, expand C/C++, select C++ Project, and then click Next.
By default, the CDT filters the Toolchain and Project types that show in the resulting lists based on the language support for the project type you selected.

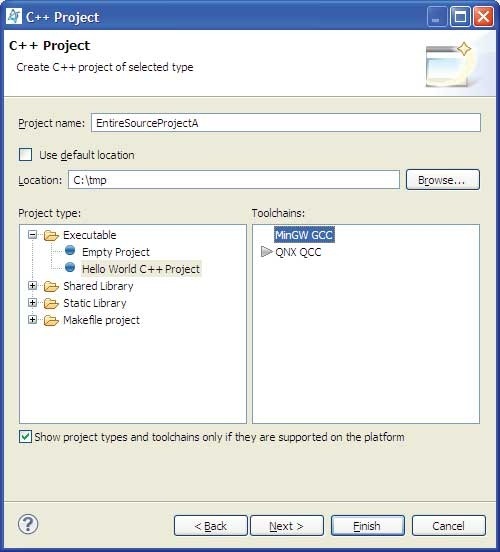
- In the Project name field, type a name for your project.
- Optional: If you want to tell the IDE where the resources reside in the filesystem (if they don't reside in your workspace), disable the Use Default Location option.
- Required (when Use Default Location is not selected): In the Location field, type the path to your source (or click Browse…).
-
Click Next.
You want to select a type for your project from the following:
- Executable
— Provides an executable application. This project type folder contains the following templates.
- Hello World C++ Project — a simple C++ application with main().
- Hello World ANSI C Project — a simple C application with main().
- Empty Project — a single source project folder that doesn't contain any files.
After specifying an Executable template, the workbench creates a project with only the metadata files required for your project type. Now, you can modify these source files, as required, and provide the source files for the project's target. Note that for an Executable project type, a makefile is automatically created for you.
- Shared Library — An executable module compiled and linked separately. When you create a project that uses a shared library (libxx.so), you define your shared library's project as a Project Reference for your application. For this project type, the CDT combines object files together and joins them so they're relocatable and can be shared by many processes. Shared libraries are named using the format libxx.so.version, where version is a number with a default of 1. The libxx.so file usually is a symbolic link to the latest version. The makefile for this project type is automatically created by the CDT.
- Static Library — A collection of object files that you can link into another application (libxx.a). The CDT combines object files (i.e. *.o) into an archive (*.a) that is directly linked into an executable. The makefile for this project type is automatically created by the CDT.
- Makefile Project
— Creates an empty project without any metadata files. This template type is useful for importing and modifying existing makefile-based projects; a new makefile isn't created for this project type.
By default, the Toolchain and template types that are currently shown in the lists are based on the language support for the project type that you selected.
- Executable
— Provides an executable application. This project type folder contains the following templates.
-
From the Project types list, expand Executable and select a project type. For example, if you selected Hello World C++ Project, the IDE provides you with a simple Hello World application in C++ format, and the CDT automatically creates a corresponding
makefile.

- Select a required toolchain from the Toolchain list. A toolchain represents the specific tools (such as a compiler, linker, and assembler) used to build your project. Additional tools, such as a debugger, can also be associated with a toolchain. Depending on the compilers installed on your system, there might be several toolchains available to select from.
- Click Next.
-
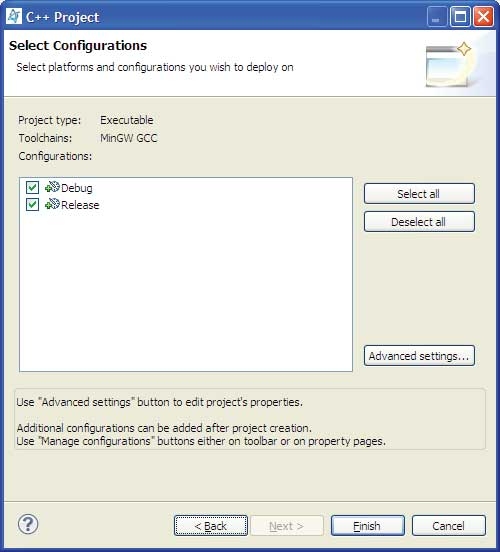
Select the types of platforms and configurations you want to use for this project.

- Click Advanced Settings.
- Expand C/C++ Build and select Settings.
- Click the Binary Parsers tab.
- Select a parser. To ensure the accuracy of the Project Explorer view and the ability to successfully run and debug your programs, selecting the correct parser is important. After you select the correct parser for your development environment and build your project, you can view the components of the .o file in the Project Explorer view. You can also view the contents of the .o file in the C/C++ editor.
- Click OK.
-
Click Finish.
If a message box prompts you to change perspectives, click Yes.
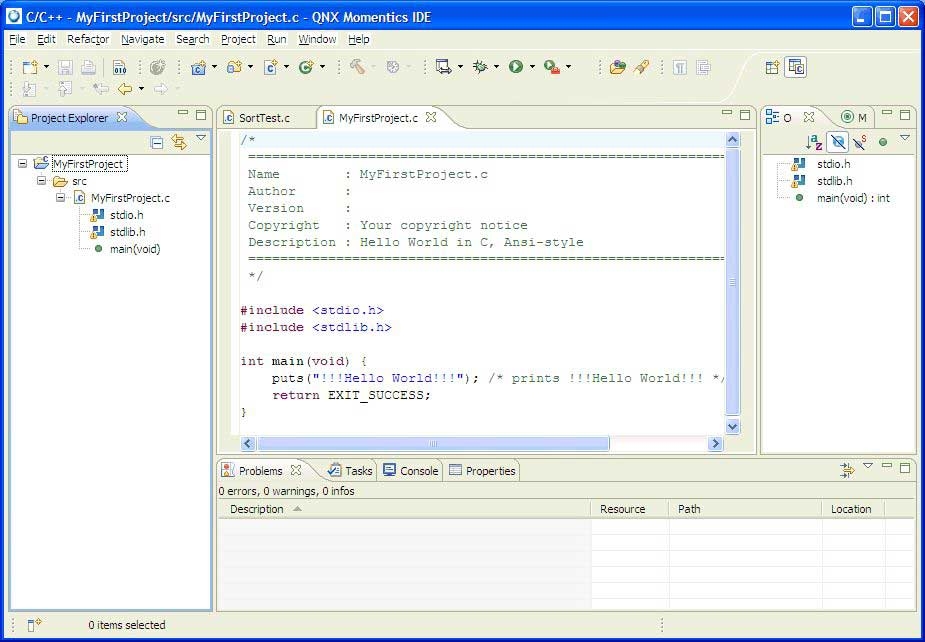
Your new project is displayed in the Project Explorer view. You should now have a project that looks something like this in the Project Explorer view:
