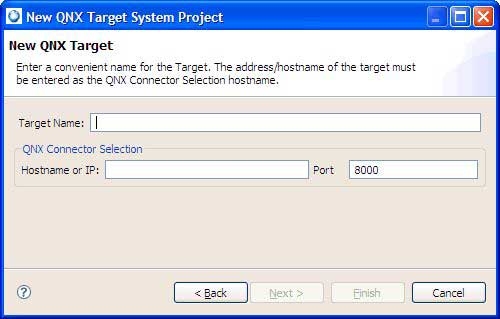
To create a QNX Target System Project: 


            - 
               From the menu, select .


            - 
               In the list, expand QNX.


            - 
               Select QNX Target System Project.


            - 
               Click Next.


            - 
               Type a name for your target.


            - 
               Type your target's hostname or IP address.


Note: When you update the Target properties from the Attributes pane, your
                  changes won't be updated if you modify the Hostname
                  or IP address, and then click
                  Apply. You must click OK
                  to confirm the changes and close the properties window for the changes to
                  take effect. 


            - 
               Click Finish.


         You'll see your new QNX Target System Project in the Project Explorer view.